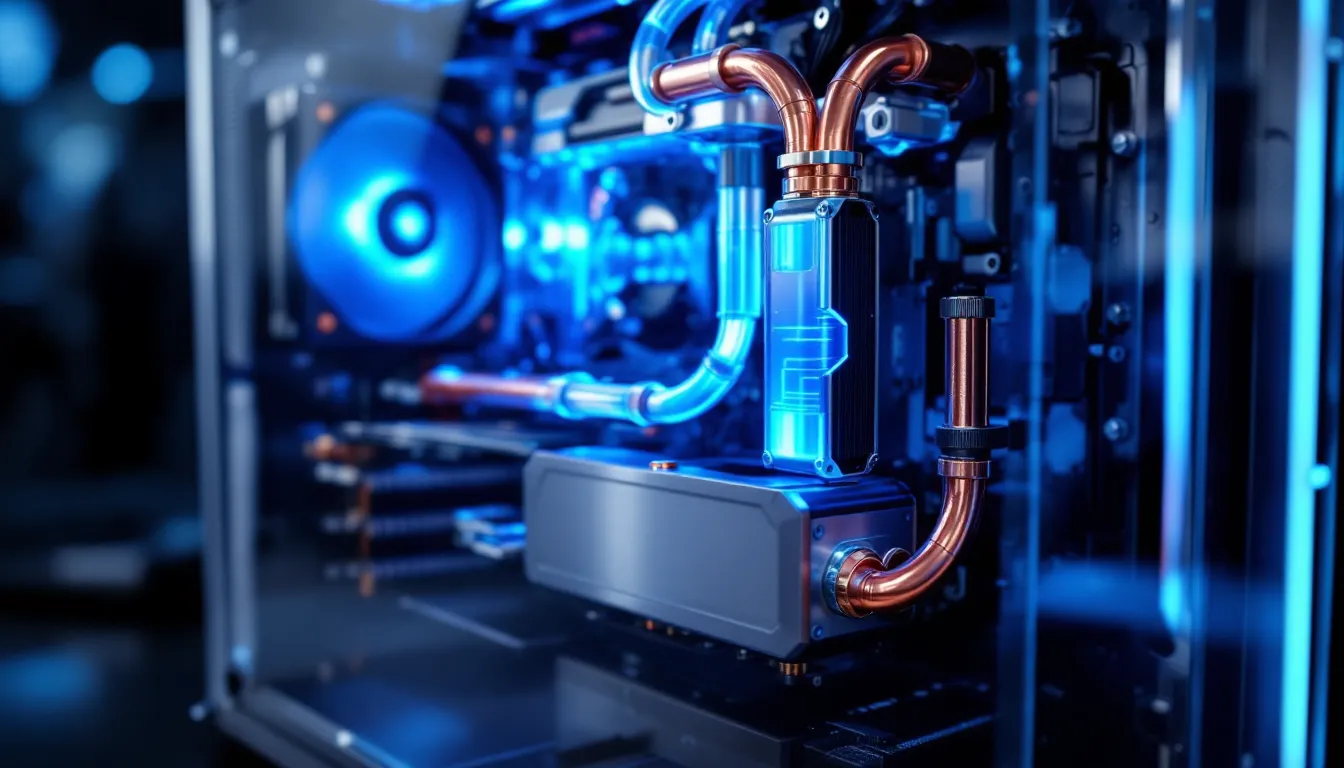
Liquid cooling has gone mainstream in gaming PCs, and for good reason. Whether you’re pushing a high-end RTX 5090 to its limits or just tired of fan noise, liquid-cooled systems deliver better thermal performance, quieter operation, and more headroom for overclocking than traditional air coolers. But liquid cooling isn’t a one-size-fits-all solution. The market in 2026 is flooded with options: affordable all-in-one (AIO) coolers under $100, custom water loops that cost thousands, and everything in between. This guide breaks down exactly what liquid cooling is, how it works, what to look for, and how to build or upgrade your own liquid-cooled gaming PC, regardless of your budget or skill level.
Key Takeaways
- Liquid-cooled gaming PCs deliver 10–20°C lower temperatures and significantly quieter operation compared to traditional air coolers, making them ideal for competitive gaming and overclocking.
- All-in-one (AIO) liquid coolers are the best entry point for most gamers, offering sealed, maintenance-free operation starting under $100, while custom loops provide maximum flexibility and cooling potential for enthusiasts willing to invest $300+.
- A mid-range AIO cooler ($150–$280) represents the optimal balance of performance, affordability, and longevity for serious gamers, providing better thermals than air cooling without the complexity of custom system maintenance.
- Proper installation and maintenance—including initial bleeding, leak testing, and annual coolant flushes for custom loops—are critical to maximizing cooling efficiency and preventing air locks or corrosion.
- Liquid cooling enables stable overclocking by maintaining lower component temperatures, allowing CPUs to sustain higher clock speeds and GPUs to avoid thermal throttling, translating to 5–15% gaming performance gains.
What Is Liquid Cooling and Why Does It Matter for Gaming?
How Liquid Cooling Works
Liquid cooling works on a simple principle: liquid (usually water mixed with additives) circulates through a system, absorbing heat from hot components and carrying it away to a radiator where fans dissipate that heat into the air.
The loop flows like this: pump → CPU/GPU block (where it absorbs heat) → radiator (where fans cool the liquid) → back to the pump. The pump is the heart of the system, it drives the liquid through the entire loop. The block sits directly on your processor or GPU, pulling heat away. The radiator is where the magic happens: fins increase surface area, and fans blow air through them to shed thermal energy.
In an all-in-one (AIO) cooler, all these parts are sealed in a single unit. In a custom loop, you assemble each component yourself, giving you way more flexibility and cooling potential.
Benefits Over Air Cooling
Liquid cooling outperforms air cooling in several measurable ways. First, thermal capacity: water absorbs and transfers heat far more efficiently than air. This means lower temperatures under load, typically 10–20°C cooler than comparable air coolers depending on the system.
Second, noise levels. An air cooler needs aggressive fan speeds to dissipate all that heat fast. Liquid cooling spreads the thermal load across a larger radiator surface, so fans can spin slower and quieter. If silence matters to you, liquid cooling is a game-changer.
Third, aesthetic flexibility. Custom loops let you route tubes but you want, choose custom fittings and pump designs, and build a rig that looks as good as it performs. AIOs come in a variety of designs too, with RGB lighting that syncs with your motherboard.
Finally, overclocking headroom. When you’re pushing a CPU or GPU beyond stock clocks, thermal headroom is everything. Liquid cooling lets you sustain higher overclocks because your components stay cooler. Competitive gamers and hardware enthusiasts rely on this for stable, high-performance systems.
Types of Liquid Cooling Systems
All-In-One (AIO) Liquid Coolers
AIOs are sealed, pre-filled units that come ready to install. You mount the block on your CPU or GPU, attach the radiator and fans, and you’re done. No refilling, no custom tubing, minimal risk of leaks, they just work.
Popular 2026 AIO options include the NZXT Kraken, Corsair iCUE, ASUS ROG Strix, and Lian Li Galahad series. Prices range from about $80 for a 240mm (single-radiator) model up to $400+ for high-end 480mm or 360mm dual-pump systems. Most AIOs have a 5–7 year lifespan, though some users report pump wear after 3–4 years of heavy use.
The downside: you can’t upgrade individual components, and if the pump fails, you’re replacing the whole unit. There’s also a small risk of pump noise (a clicking or grinding sound) if the unit experiences air bubbles, though this is rare in modern AIOs.
Custom Water Cooling Loops
Custom loops give you complete control. You buy a pump, radiator, blocks, tubing, fittings, and coolant separately, then assemble them but you want. You can cool just your CPU, or both your CPU and GPU. You can use hard acrylic tubing for a striking look, or flexible rubber tubing for easier bends.
A basic custom loop for a single component (CPU or GPU) runs $300–$600. A full dual-block system with high-end components, custom fittings, and decorative tubing can easily hit $1,500–$3,000+. Popular brands include EK Water Blocks, Corsair (for components), Alphacool, and XSPC.
Custom loops demand more maintenance: you’ll need to flush and refill your coolant annually, monitor for leaks, and keep an eye on pump performance. But if something fails, you replace just that part. Plus, your system is infinitely upgradeable.
Choosing Between AIO and Custom Solutions
Choose an AIO if you want simplicity, lower cost, and zero maintenance headaches. AIOs are ideal for first-time liquid coolers and for gamers who prioritize reliability over customization. They’re also perfect if you plan to upgrade your CPU or GPU frequently, an AIO can usually move between builds.
Choose a custom loop if you’re willing to invest time and money, want maximum cooling performance, plan to keep your hardware for 5+ years, or want a showstopping aesthetic. Custom loops are favored by competitive overclocking communities and hardcore enthusiasts.
If you’re torn, start with an AIO. You’ll get liquid cooling’s benefits without the learning curve. You can always upgrade to a custom loop later if you catch the modding bug.
Key Components and What to Look For
Pump Performance and Flow Rate
The pump is the workhorse. It must move liquid fast enough to carry heat away without creating excessive noise or turbulence. Look for pumps rated at 50–150 liters per hour (LPH) for most systems.
Pump types matter:
- Centrifugal pumps: Most common in AIOs. Quiet, reliable, 1,000–3,000 RPM.
- Laing D5 pump: Popular in custom loops. High flow rate, very reliable, can run 2,500–4,500 RPM. Industry standard for enthusiasts.
- DDC pump: Smaller, louder, better for tight spaces. 2,500–5,000 RPM. Watch for resonance noise.
For gaming, you don’t need extreme flow rates. A solid 80–100 LPH pump handles CPU cooling just fine. GPU blocks demand higher flow rates, aim for 100+ LPH if cooling both components.
Look for pumps with integrated voltage regulators so you can dial in speed via motherboard headers or software. This lets you balance cooling performance against noise.
Radiator Size and Material
Radiator size determines cooling capacity. Sizes are measured in fan count: 120mm (single fan), 240mm (two fans), 360mm (three fans), 480mm (four fans).
Use this as a baseline:
- 240mm: Good for mid-range CPUs under light overclocking.
- 280mm or 360mm: Ideal for high-end CPUs, light GPU cooling, or both components with moderate overclocking.
- 420mm or 480mm: For extreme builds, dual-block systems, or aggressive overclocking.
Larger radiators = better cooling and quieter fans (since they spin slower). But they take up more space in your case, so measure your chassis first.
Material affects performance too:
- Aluminum: Lighter, cheaper, good for AIOs. Slightly lower thermal conductivity than copper.
- Copper: Superior thermal performance, heavier, more expensive. Preferred for custom loops.
- Hybrid: Some radiators mix aluminum and copper for balance.
If you’re using distilled water + additives, aluminum is fine. If using copper, make sure your coolant is compatible, some older coolants corrode copper.
Block Types and Compatibility
CPU blocks mount directly onto the processor. They’re available for Intel (LGA1700, older sockets) and AMD (AM5, AM4). Always check your exact CPU socket before buying, a block built for LGA1700 won’t fit AM5.
GPU blocks come in two types:
- Full-cover blocks: Cool the GPU core, memory, and power delivery. Maximum performance, higher price ($100–$300+).
- Core-only blocks: Cool just the GPU core. Cheaper ($60–$150), sufficient for gaming, memory and power delivery run warm but within safe limits.
GPU block compatibility is finicky. Different GPU models (RTX 5090 Founder’s Edition vs. EVGA RTX 5090, for example) have different layouts. Verify block compatibility against your exact card before buying. Sites like EK Water Blocks list compatible GPUs explicitly.
Fans, Tubes, and Fittings
Radiator fans should move air without excessive noise. Aim for fans that move 100–150 CFM (cubic feet per minute) per 120mm fan at acceptable noise levels. Static pressure matters: fans pushing air through radiator fins need decent SP (static pressure) ratings, typically 3.0+ mm H₂O.
Popular gaming-focused radiator fans include:
- Corsair ML120/ML140 (magnetic levitation, very quiet)
- Noctua NF-A12x25 (excellent performance, quiet, pricey)
- Be Quiet. Silent Wings (strong performance, German engineering)
Tubing comes in two styles:
- Flexible tubing: Easier to route, forgiving to mistakes, can kink if bent sharply. Standard inner diameters (ID) are 1/2″ (12.7mm) or 3/8″ (9.5mm).
- Hard acrylic tubing: Looks premium, requires precision bends, vulnerable to cracking if dropped or bent while cold.
Most gamers use 1/2″ ID tubing, it fits most fittings and blocks.
Fittings connect tubes to blocks and radiators. They come in compression (twist-on, easy) or push-to-connect (quick-release, modern but pricier). Buy fittings that match your tubing diameter. Rotary fittings let you orient tubes without twisting, reducing stress on connections.
Building Your Liquid Cooled Gaming PC
Planning Your Configuration
Before you buy anything, plan your loop layout:
- Identify your components: What CPU and GPU are you cooling? What’s your case? How much space do you have?
- Choose your radiator size: Use the guidelines above. If space is tight, a 240mm AIO might be your only option. If you have room, 360mm gives you more headroom and quieter fans.
- Select your mounting location: Radiators can mount on the top, front, or rear of your case. Front mounts are common but take up drive bays. Top mounts are cleaner but may limit RAM clearance. Rear mounts use less space but cool less efficiently.
- Plan your flow path: In custom loops, the ideal path is pump → CPU block → GPU block → radiator. This minimizes turbulence. You can deviate, but avoid loops that create stagnant zones.
- Budget your cooling: AIOs are straightforward, pick a size and brand. Custom loops demand more planning: pump ($80–$200), radiator ($100–$300), blocks ($80–$150 per block), tubing and fittings ($100–$200), coolant ($20–$50), and a flow meter or temperature sensor if you want monitoring ($30–$80).
Installation Step-by-Step
For AIOs:
- Prepare your case: Remove the appropriate fan mounts (top, front, or rear, depending on your radiator).
- Install the radiator and fans: Screw the radiator to your case. Attach fans using the included mounting hardware. Orient fans to push or pull air (push = outside air in, pull = warm air out). Generally, intake is cooler than exhaust air.
- Mount the block: Apply thermal paste to your CPU in a small dot or X pattern (not a thick layer). Align the block mount with your CPU socket and secure using the included backplate and fasteners. For GPUs, follow the manufacturer’s instructions, many AIOs don’t support GPU cooling.
- Connect cables: Plug the pump power into your motherboard’s CPU fan header (or a dedicated AIO header). Connect fan headers to your motherboard or a PWM hub.
- Test before closing: Power on and let the pump run for 30 seconds to confirm it’s working. Check for leaks.
- Cable management and close-up: Route cables neatly and reseal your case.
For Custom Loops:
- Install the pump and reservoir: Drill mounting holes if needed. Use anti-vibration mounts to reduce pump noise. Position the reservoir so the pump inlet is submerged.
- Prepare your blocks: Apply thermal paste to CPU and GPU blocks (same application method as AIOs).
- Mount CPU and GPU blocks: Follow instructions for your specific blocks. Ensure they’re seated firmly and level, uneven pressure causes hot spots.
- Route your tubing: Plan your path before cutting hard tubing. For hard tubing, measure twice, cut once. Heat the acrylic gently with a heat gun to make gentle bends. For soft tubing, plan your bends without sharp kinks.
- Install fittings: Thread fittings onto block ports and radiator ports. Hand-tight is usually sufficient: don’t over-torque.
- Connect the radiator: Mount it using case screws and ensure it’s stable.
- Fill the loop: Disconnect the pump from power first. Pour pre-mixed coolant into the reservoir (usually a 50/50 distilled water + coolant additive mix, or pre-made gaming coolant). Do NOT use tap water.
- Bleed the system: Reconnect power and run the pump for 30 seconds at a time, stopping to add more coolant as air bubbles escape. Repeat until the pump runs smoothly. This prevents air locks that reduce cooling efficiency.
Bleeding and Leak Testing
Bleeding removes air from the loop. Air pockets reduce cooling performance and can cause pump cavitation (audible grinding).
- Initial fill: Pour coolant until the reservoir is 3/4 full. Leave room for expansion.
- Run cycles: Power the pump on for 15–30 seconds, off for 15 seconds. Listen for grinding or wheezing, these indicate air in the pump.
- Add coolant: As air escapes, coolant level drops. Keep topping it off.
- Monitor temperature: After 5–10 cycles, run the loop continuously for 10 minutes. Let temperatures stabilize. Successful bleeding means smooth pump operation and stable temps.
Leak testing:
- Leave the system running for 30 minutes while you watch closely. Check all fitting connections, block seams, and tube connections.
- Use a flashlight to inspect hard-to-see spots like the back of blocks or radiator seams.
- Have paper towels ready. A minor drip at a fitting is usually just a loose compression fitting, tighten by 1/4 turn.
- If you spot active leaks at seals (not fittings), shut down immediately, drain the loop, and reseat the block. Retest.
- Do NOT run your gaming PC at full load until you’re 100% confident there are no leaks. Liquid and electronics don’t mix.
Once you’ve confirmed no leaks after 30 minutes of idle running, you can proceed with normal use.
Performance Optimization and Maintenance
Maximizing Cooling Efficiency
Once your liquid cooling system is running, tweak it for peak performance:
- Pump speed: Most pumps can run at adjustable RPMs via BIOS or software. Increase pump speed under heavy load to maximize flow rate. A pump running at 60% during gaming and 100% during stress tests balances performance and noise.
- Fan curves: Set up custom fan curves in your motherboard BIOS or cooler software. Example: fans at 50% at 30°C, ramping to 100% at 70°C. Aggressive curves mean cooler temps but more noise: relaxed curves are quieter but run hotter.
- Ambient temperature: Cooler room = cooler loop. If your room is 25°C vs. 35°C, you’ll see 5–10°C difference in your CPU temps. Can’t control climate? Ensure case intake fans pull from the coolest part of your room.
- Radiator positioning: Front-mounted radiators pull warm air from outside the case (good for GPU cooling, bad for case thermals). Top-mount exhausts warm case air (good for overall case cooling). Experiment to find your sweet spot.
- Monitor and log: Use software like HWiNFO or Corsair iCUE to monitor CPU/GPU temps, pump speed, and fan speeds in real-time. Log data during a 1-hour gaming session. This baseline helps you spot future performance drops.
Regular Maintenance Schedule
Monthly:
- Check for visible leaks (custom loops only).
- Verify pump is running smoothly with no grinding noise.
- Ensure radiator fans spin freely and aren’t clogged with dust.
Every 3 months:
- Clean radiator fins with compressed air (unplug fans first to avoid static damage).
- Check fitting tightness (custom loops only). Hand-tight + 1/4 turn is ideal: don’t over-tighten.
- Review temperature logs. If idle temps increased by 5°C+ since last check, air may have entered the loop.
Annually:
- For AIOs: No required maintenance beyond dust cleaning. Some users use isopropyl alcohol to clean dried coolant residue off pump connections, though this is optional.
- For custom loops: Drain and flush the entire loop. Mix new coolant (50/50 distilled water + additive, or pre-made gaming coolant). This removes particulates and refreshes additives that prevent algae and corrosion.
- Inspect blocks for discoloration or deposits. Light white deposits are minerals (harmless if using distilled water). Dark/black deposits indicate corrosion, flush immediately.
Every 2–3 years:
- Replace pump thermal paste (custom loops) if you’re noticing temperature creep.
- Consider replacing radiator fans if they’re noticeably louder than when new (bearing wear).
- For AIOs: Most retain performance beyond 3 years, but if you’re noticing significant temperature degradation, the pump seals may be wearing out. Consider replacement.
Common Issues and Troubleshooting
Issue: High CPU/GPU temperatures even though new liquid cooler
- Thermal paste: Too little paste or uneven application leaves air gaps. Remove the block and reapply with a rice grain or small X pattern.
- Block mounting: Blocks must be level and apply even pressure. Check that all fasteners are equally tight.
- Air bubbles: Custom loops especially, run the pump and listen for grinding. Bleed the system again.
- Pump failure: If the pump is silent or barely audible, it may have failed. Test by manually rotating the pump shaft (if accessible) or running it at 100% via BIOS. If nothing happens, replacement is needed.
Issue: Pump making grinding, wheezing, or vibrating noise
- Air in pump: Most common. Bleed again by running short cycles and adding coolant.
- Pump speed too high: Lower pump RPM by 10–20%. Excessive speed increases cavitation noise.
- Anti-vibration mounts failing: Check that pump is secured with vibration-dampening mounts. If missing, add them.
- Debris in pump: In custom loops, if you’ve used tap water or non-filtered coolant, particles may clog the pump. Drain, clean, and refill with distilled water + approved coolant.
Issue: Coolant level dropping in custom loops
- Evaporation: Over months, some water evaporates, especially in warm rooms. This is normal. Top up with distilled water (not coolant) to maintain balance.
- Leaks: Check all fittings and block seams. A slow leak might not be immediately visible but shows as gradual level drop over weeks. Tighten fittings or reseat blocks if needed.
- Weeping from pump seal: Rare but possible after 2+ years. If minor, adding coolant every few months is acceptable. If severe, pump replacement is needed.
Issue: Coolant discoloration (cloudy, algae-like green/brown tint)
- This indicates algae growth or corrosion. Drain the loop immediately, flush with distilled water, and refill with fresh coolant.
- Use only distilled water (not tap water) and approved coolant additives designed for nickel blocks and copper radiators.
- If using a custom loop, add a biocide additive annually to prevent algae (brands like Corsair or EK sell these).
These issues are rare in modern AIOs because they’re sealed. Custom loop users encounter them more often, but preventive maintenance (annual flushes, proper coolant) nearly eliminates them.
Budget-Friendly vs. High-End Liquid Cooling Options
Entry-Level AIO Coolers
If you’re new to liquid cooling or just want better thermals without very costly, entry-level AIOs are your answer. These typically cost $80–$150 and offer excellent value.
Best entry-level picks for 2026:
- NZXT Kraken 240/280: $99–$130. Compact, reliable, good RGB integration via NZXT CAM software. Sufficient for Ryzen 7 or Core i7 under light overclocking.
- Corsair iCUE Core XT 240: $99. Solid performer, works with Corsair iCUE ecosystem if you own other Corsair gear. Quiet operation.
- Cooler Master MasterLiquid 240: $89. Budget-friendly, adequate cooling, simple setup.
These coolers keep mid-range CPUs 10–15°C cooler than stock Intel/AMD coolers and run quieter. Ideal for:
- First-time liquid cooling users.
- Budget gaming builds ($1,200–$2,000 total).
- Silent PC builds where noise matters more than extreme performance.
Downsides:
- Limited to CPU cooling (no GPU cooling).
- Smaller radiators mean higher fan speeds under heavy load.
- Can’t upgrade individual parts.
Mid-Range Performance Systems
Mid-range liquid coolers ($200–$500) give you better cooling, often support GPU cooling, and offer more aesthetic flexibility. This tier is perfect for high-end single-GPU builds and competitive gaming setups.
AIO mid-range options:
- Corsair iCUE H150i Elite: $280. 360mm radiator, three large fans, sufficient for a high-end CPU with modest overclocking. Integrates with Corsair RGB ecosystem.
- NZXT Kraken 360/420: $200–$260. Larger surface area than budget models, better cooling for aggressive workloads.
- ASUS ROG Strix LC 240/360: $250–$320. Premium build quality, syncs with ASUS motherboards for unified RGB.
Basic custom loop:
If you’re willing to spend $300–$500 on components, you can build a single-block custom loop (CPU only) that cools better than most AIOs:
- Laing D5 pump + reservoir combo ($150–$200)
- 360mm radiator ($100–$150)
- CPU block ($80–$120)
- Tubing and fittings ($80–$120)
- Coolant ($30–$50)
Total: ~$450–$650 depending on brand and quality. Performance exceeds $400 AIOs, and you can upgrade the radiator or add a GPU block later.
Mid-range setups are ideal for:
- Competitive gamers pushing high frame rates in esports titles.
- Streamers who need stable thermals during long sessions.
- Overclockers wanting more headroom than budget AIOs provide.
- Builders who value aesthetics and customization.
Premium and Extreme Custom Builds
High-end custom loops ($800–$3,000+) are for enthusiasts, competitive overclockers, and builders who treat their PC like a showcase. These systems deliver maximum cooling, stunning visuals, and complete control.
Premium custom loop components:
- Pump/reservoir combo: EK or Corsair dual-pump setups ($300–$500). Dual pumps allow independent CPU and GPU cooling circuits.
- Radiators: Multiple 360mm or 480mm radiators in copper ($150–$250 each). Larger surface area = lower temps and quieter fans.
- GPU and CPU blocks: High-end full-cover GPU blocks ($200–$350), quality CPU blocks ($100–$150).
- Custom fittings and tubing: Rotary adapters, decorative fittings, hard acrylic tubing ($300–$600).
- Advanced monitoring: Flow meters, temperature sensors, integrated RGB controllers ($100–$200).
A dual-block setup (CPU + GPU) with premium components easily runs $1,500–$2,500.
Extreme overclocking setups:
Competitive overclockers sometimes add chiller units (external cooling devices) that drop loop temperature to near 0°C. Combined with extreme custom loops, this can cost $4,000+. It’s overkill for gaming, but necessary for CPU/GPU silicon lottery benchmarking.
When to go premium:
- You’re building a dream rig and plan to keep it 5+ years.
- You want dual-GPU cooling (rare in 2026 but still done by some enthusiasts).
- Aesthetics and showpiece status matter as much as performance.
- You’re serious about overclocking and want maximum headroom.
- You have the space (most premium loops demand large cases like Lian Li O11 or Corsair Crystal).
Cost-to-performance reality:
Once you’re above $300–$400 on cooling, you’re paying for diminishing returns in actual gaming performance. A $300 AIO cools a high-end CPU nearly as well as a $1,500 custom loop. The premium price buys you:
- Aesthetics (looks matter to some).
- Upgradeability (custom loops let you swap parts).
- Extreme overclocking headroom (if that’s your thing).
- Peace of mind from potential upgrade paths.
For pure gaming performance, a mid-range AIO or budget custom loop is the sweet spot.
Liquid Cooling for Competitive Gaming and Overclocking
Thermal Headroom for High-Performance CPUs
Competitive gamers chasing high frame rates and overclockers pushing silicon limits both rely on thermal headroom. In simple terms: lower CPU temperatures = higher stable clock speeds.
Modern high-end CPUs (Intel Core i9-14900K, AMD Ryzen 9 7950X3D) can reach 85–90°C under stock settings when using quality air coolers. With liquid cooling, the same CPU might hit only 65–75°C, leaving 10–15°C of thermal headroom for overclocking.
Why does this matter? Each 10°C drop in temperature typically allows 50–100 MHz higher stable clock speed. A CPU overclocked to 5.8 GHz might be unstable and throttle at 85°C. Cool it to 70°C with liquid cooling, and you might push it to 6.0 GHz stable.
For competitive gaming, this translates to:
- CS2 (highly CPU-limited): Stable 360+ fps instead of dipping to 200–250 fps.
- Valorant: Locked 240+ fps even during intense firefights without frame drops.
- Overwatch 2: Rock-solid 240 fps in team fights where air-cooled CPUs might dip.
Esports pros using high-end gaming laptops or desktop setups almost universally use liquid cooling for this exact reason, thermal stability = frame stability.
GPU Liquid Cooling Advantages
GPU cooling is where liquid cooling shines brightest for gaming performance. Gaming GPUs (RTX 5090, RTX 5080) generate immense heat, and their performance is closely tied to temperature.
How it works: Modern GPUs throttle when reaching thermal limits (typically 80–83°C on RTX cards). Thermal throttling reduces clock speed, slashing frame rates. Liquid cooling keeps GPUs cooler, preventing throttle and maintaining peak performance.
Performance impact:
A GPU running at 65°C (liquid cooled) versus 80°C (air cooled, thermal throttle) can see 5–15% frame rate differences in demanding games like Cyberpunk 2077, Avatar: Frontiers of Pandora, or Star Citizen.
Air coolers pull fans directly from the GPU shroud, but mounting space is limited. Liquid cooling can place a 360mm radiator anywhere in your case, moving thermal load away from the GPU itself.
Which GPUs benefit most:
- RTX 5090: Extremely hot, benefits significantly from liquid cooling. Air coolers keep it in the 75–82°C range: liquid can get it to 55–65°C.
- RTX 5080/5070: Still hot, benefits noticeably. Air coolers: 70–78°C. Liquid: 50–60°C.
- Mid-range GPUs (RTX 5060): Less dramatic benefit. Already reasonable on air, but liquid makes a difference if you’re overclocking.
Full-cover GPU water blocks are the gold standard, cooling the GPU core, memory, and VRM (voltage regulator) all at once. Performance is measurably better than core-only blocks, especially under sustained gaming or rendering loads.
Overclocking Stability and Temperature Control
Overclocking is where liquid cooling becomes essential. Air cooling maxes out around 65–75°C under heavy load for high-end hardware: liquid cooling gets you to 50–65°C, opening overclocking headroom.
Overclocking best practices with liquid cooling:
- Establish a baseline: Run stock settings and note temperatures under a stress test like Prime95 or 3DMark. You need this reference to confirm an overclock is stable.
- Increase core clock moderately: Start with +50–100 MHz. Run a 10-minute stress test. If stable and temps are acceptable (under 80°C for CPUs, 75°C for GPUs), continue.
- Monitor temperatures obsessively: Use HWiNFO or GPU-Z to log temps during overclocking. Spikes above 85°C indicate instability brewing.
- Increase voltage carefully: Undervolting (lowering voltage) while maintaining the same clock is ideal, it reduces heat. Overvolting increases heat exponentially. A CPU at +1.4V can draw 2x the power of stock, generating excessive heat. Stick to +0.05–0.10V increments.
- Test stability rigorously: A stable 3D game is not a stable overclock. Use Prime95, MemTest86, or FurMark for 30+ minutes. Crashes or errors = reduce clock or increase voltage slightly.
- Monitor long-term: Run your daily applications (games, streaming software) for a week. If you’re getting random freezes or reboots, your overclock isn’t stable, dial it back.
Liquid cooling advantages for overclocking:
- Precision thermal control: Adjust pump and fan speeds in real-time to maintain stable temperatures. Air coolers don’t offer this level of control.
- Thermal stability: Consistent temps = consistent performance. Air coolers suffer from thermal cycling (temp spikes and drops) that can cause instability.
- Extreme overclocking potential: Push 6.2+ GHz on high-end CPUs, or achieve double-digit MHz overclocks on high-end GPUs, only feasible with liquid cooling.
For competitive gamers, liquid cooling provides 5–15% performance gains through thermal stability. For overclockers, it’s the difference between a marginal overclock and a significant one.
A practical example: An RTX 5080 cooled by air might run Cyberpunk 2077 at 5,600 MHz (gpu-z max boost) and average 98 fps at 1440p, high settings. Liquid-cooled, staying 15°C cooler, the same GPU maintains 5,800+ MHz boost clock consistently, averaging 106 fps, a 8% gain just from staying cooler. No new hardware, just thermal efficiency.
Conclusion
Liquid cooling is no longer a niche hobby, it’s a mainstream solution for anyone serious about gaming PC performance. Whether you pick an affordable AIO or jump into custom loops, you’re investing in better thermals, quieter operation, and thermal headroom that translates to real performance gains.
For most gamers, a mid-range AIO ($150–$280) is the sweet spot: better thermals than air cooling, zero maintenance, and a 5–7 year lifespan. Budget-conscious builders benefit from entry-level AIOs that cost less than a new game. Overclocking enthusiasts and competitive gamers chasing frame stability will find custom loops worth the investment, especially for GPU cooling.
The market has matured since liquid cooling was cutting-edge. Brands like Corsair, NZXT, and EK Water Blocks have engineered reliability into their products. Reviews and benchmarks from sources like Tom’s Hardware provide detailed comparisons of specific coolers if you want model-level guidance.
Your next step: measure your case dimensions, identify your CPU and GPU, set your budget, and pick a cooler that matches those criteria. If you’re torn between AIO and custom, start with an AIO. You’ll get the benefits of liquid cooling without the learning curve, and you can always upgrade later if you catch the overclocking bug.
Liquid cooling doesn’t just make your PC cooler, it makes it faster, quieter, and way cooler to look at. For competitive gamers, hardcore overclockers, and anyone tired of fan noise, it’s worth every penny.